Turn Simple Fabric into Professional Custom Patches
Making patches with an embroidery machine is a skill that can help hobbyists, small businesses, and clothing brands create unique products. Embroidered patches add style, identity, and value to jackets, uniforms, hats, backpacks, and many other items. With the right tools and techniques, you can make professional-quality patches that look clean and durable.
Learning how to make patches with embroidery machine is easier than many people think. Modern embroidery machines offer advanced features that help users create detailed designs with precision. Whether you are making patches for personal use or commercial production, following the correct process will help you achieve excellent results.
Why Embroidered Patches Are So Popular
Embroidered patches have become a favorite choice for fashion brands, sports teams, schools, and organizations. They offer a professional appearance while allowing complete design flexibility. Unlike direct embroidery on garments, patches can be attached to different products whenever needed.
Some key benefits of embroidered patches include:
Long-lasting durability
Professional and attractive appearance
Easy application on various garments
Cost-effective branding solution
Custom shapes, sizes, and colors
Ideal for uniforms, hats, bags, and jackets
These advantages make embroidered patches a valuable addition to any clothing or branding project.
Essential Materials for Making Embroidery Patches
Before starting, gather all the necessary supplies. Having quality materials can significantly improve the final result.
Fabric Base
Choose strong fabrics such as twill, felt, Vel Clothing, or canvas. These materials provide excellent support for embroidery stitches and maintain their shape over time.
Embroidery Machine
A reliable embroidery machine is the foundation of patch production. Make sure your machine supports custom embroidery designs and allows precise stitching.
Stabilizer and Thread
Use a strong stabilizer to prevent fabric movement during embroidery. High-quality embroidery thread ensures vibrant colors and long-lasting performance.
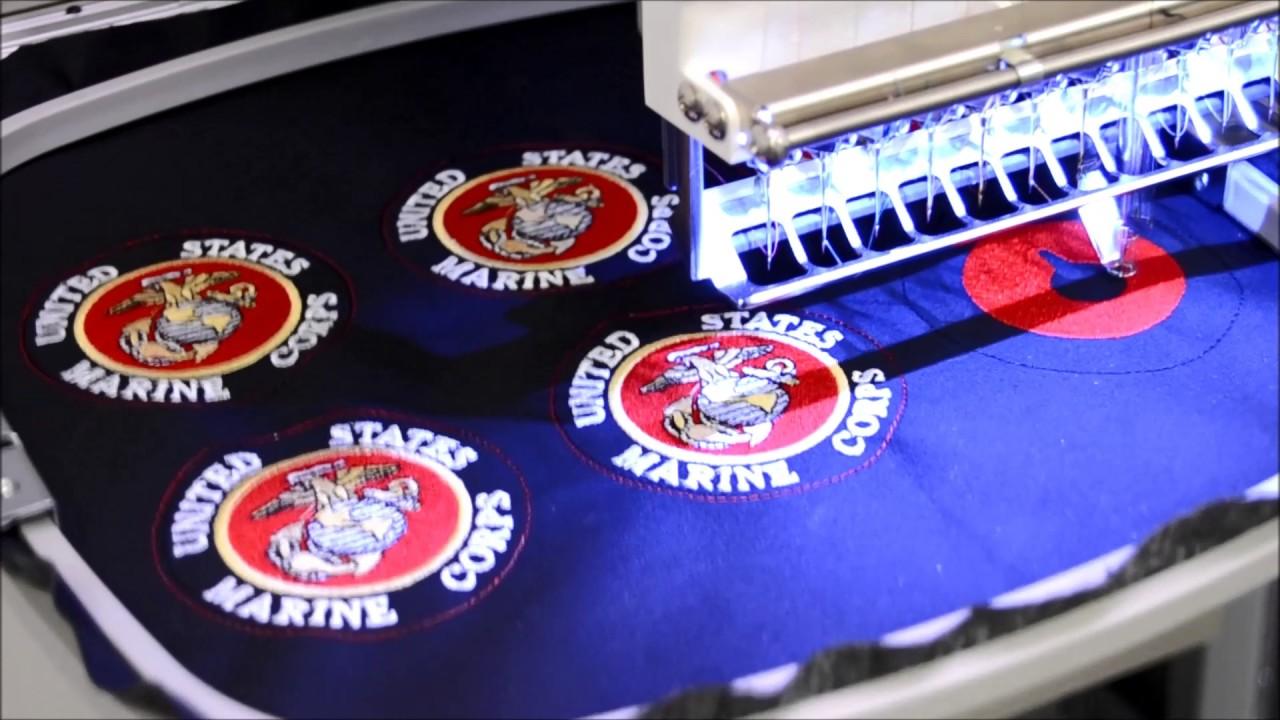
Step-by-Step Process to Create Professional Patches
Creating patches requires attention to detail. Following these steps will help you achieve professional results.
Create or Upload Your Design
Start by designing your artwork using embroidery software. Keep the design simple and clear, especially if the patch will be small. Convert the artwork into an embroidery file compatible with your machine.
Hoop the Fabric Correctly
Secure the patch fabric and stabilizer tightly inside the embroidery hoop. Proper hooping prevents wrinkles and helps maintain accurate stitching.
Stitch the Patch Border
Most professional patches include a border stitch. This border defines the patch shape and gives it a polished appearance. Many embroiderers use a satin stitch border for a clean finish.
Complete the Embroidery
Allow the machine to stitch the full design. Monitor the process to ensure thread colors change correctly and there are no stitching errors.
Cut and Finish the Patch
After embroidery is complete, carefully trim the patch around the border. Some manufacturers use heat-cutting equipment, while others trim manually for precision.
Tips for Better Embroidery Patch Results
Professional-quality patches require more than just good equipment. Small details make a big difference.
Always test your design before producing multiple patches. Check thread tension regularly and ensure the stabilizer is suitable for the chosen fabric. Use high-quality embroidery thread to maintain color consistency and durability.
Additionally, selecting the correct stitch density prevents puckering and creates a cleaner appearance. Taking time to perfect these details can improve the overall quality of every patch you make.
Common Mistakes to Avoid
Many beginners encounter problems when creating patches. Avoiding these mistakes can save time and materials.
Using weak fabric, poor-quality thread, or improper stabilizers can lead to patch failure. Overly detailed designs may also lose clarity when stitched. Another common mistake is trimming too close to the border, which can damage the patch edge.
Careful planning and testing can help eliminate these issues and improve production efficiency.
Final Thoughts
Mastering embroidery patch production takes practice, patience, and attention to detail. By choosing quality materials, preparing designs correctly, and following a structured process, anyone can create professional-looking patches. Whether you are producing patches for personal projects, uniforms, or fashion collections, the right techniques will deliver outstanding results. For businesses and brands looking to expand their apparel production and customization options, Vel Clothing provides valuable resources and industry expertise to help bring creative ideas to life.